저자: JuanRodriguez · 외국인
요약 보기
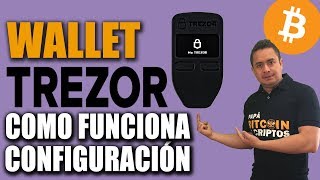
이 영상은 투자 조언이 아니라 하드웨어 지갑(트레저 원) 사용법을 소개하는 튜토리얼이다. 핵심 주장: 비트코인은 개인키/복구 시드를 직접 통제해야 진짜 내 자산이다('네 키가 아니면 네 비트코인이 아니다'). 지갑 유형 설명: 온라인 지갑은 항상 인터넷에 연결되어 해킹 표적이 되므로 권장하지 않는다. 소프트웨어 지갑은 일상 소액 결제용으로 쓴다. 하드웨어(물리) 지갑은 대부분 인터넷과 분리되어 있고 보안칩에 개인키를 보관하므로 큰 금액 보관에 적합하다. 구매 주의: 오픈소스 여부, 제조사 신뢰도(2014년 첫 하드웨어 지갑 출시 회사), 봉인 스티커 확인을 강조하며, 저가 위조품을 피하고 제조사에서 직접 구매하라고 권한다. 설정 과정 시연: 펌웨어 설치, 24단어 복구 구문(시드) 백업(사진·클라우드·인터넷 저장 금지, 종이에 기록), 숫자 PIN 설정, 펌웨어 업데이트 과정을 단계별로 보여준다. 사용법: 수신 주소 확인, 전송 시 수수료 조절, 공개키 노출 위험 경고, 패스프레이즈(추가 비밀번호) 기능 소개(시드가 노출되어도 보호 가능하나, 잊으면 자산 접근 불가하므로 주의)를 다룬다. 마무리: 제품 구매 링크를 통한 채널 후원 요청, 향후 고급 주제(패스프레이즈) 영상 예고. ※ 영상 내 가격 방향에 대한 예측 발언은 없음.
다듬은 글
Hello friends, I'm Juan Rodriguez. In this video, I want to remind you that if you have Bitcoin or perhaps some other crypto assets, you should have a physical wallet. Remember that this technology aims to give you back sovereignty, total control over your value, but you only really apply that depending on how you're storing your Bitcoin.
In this case, there's a very true and clear saying: if they're not your keys, they're not your Bitcoin. What does that mean? If you're not the one who controls the private keys or the recovery seeds, those Bitcoins aren't yours. That should be perfectly clear. Look, there are three types of wallets: online wallets, which are the ones I don't recommend.
I don't recommend them because these wallets remain connected to the internet 100% of the time, and that's where attacks come from. They're a huge bounty target for hackers. But besides that, there's something worse: many of these wallets keep your private keys. That is, they're the ones controlling your funds.
Now, there are others that give them to you, but they share that storage method with you, and the way you access your funds is already private. It's not the best. 2. There are... Software wallets are those that you download to your phone or computer. These are the wallets you should use for your daily spending, for what you consume most frequently.
On my website, www.bitcoincrypto.com, you'll find a tutorial on how to download and use this type of wallet. Now, there are physical wallets, which are generally disconnected from the internet almost 100% of the time. This is where attacks originate. They have an internal security chip where your private keys are stored.
These keys are what you use to identify yourself to the network and validate your bitcoin transactions. This security chip is one of the major differences between these physical wallets and the software wallets you download to your phone or laptop. These phones don't have a security chip to properly back up this information.
Remember that you don't need to be connected to your physical wallet to receive bitcoin; sending is the only time it needs to be connected. In short, treat the money you have in bitcoin the same way you would treat fiat currency, that is, in hardware or physical wallets. Get used to storing your savings, that valuable money you hold in large quantities, just like you do with fiat currency, in a safe or perhaps at the bank.
Use software wallets that you download to your phone for your daily transactions. Next, I'm going to show you important things about this wallet and, above all, how to get started. The first thing you need to know is that this is a physical wallet; there are others like this one, and you can choose.
This law doesn't require any specific features, but the important thing is that the one you choose is open source, both software and hardware, so that it can be verified. Secondly, it should ideally have the track record and experience that, in this case, 3 or One 3 Uruguay, comes from the company Tosi Lapsus.
They released the first hardware wallet in 2014. What you need to keep in mind, above all, are these seals, these two seals that you see here. Make sure the cellophane paper hasn't been altered in any way. Also, here on the back, there's this code that tells you which page to log off to in order to start it.
Now, to be able to withdraw your Tressor, you have to destroy the box because it has to be very well sealed. These are tips you should take away. Look, I advise you that if you're going to buy this wallet, please do it directly from the manufacturer because there are many cheap copies on the market, many things that can ultimately lead to a bad experience, that is, the loss of your bitcoins.
In the description of this video, I'm going to leave you a link. If you buy your wallet with that link, you'll be supporting the channel here. I just opened the box, and as you can see, it was impossible. I tried very carefully not to damage the box, but look, it was impossible. I had to tear it open.
You can see it there. Well, the rest is what you can see inside. This is an instruction manual. These are some stickers. Here's where you write down the seed phrases, which are the recovery phrases. Whatever happens to your Tressor, or simply with these seeds, you'll be able to buy another Tressor and recover your bitcoins, or simply use another type of wallet, which does n't have to be physical.
It could be software, since it uses the same VIP. With these seeds, you'll be able to recover your bitcoins. They give you two of these. Here in this protector is the cable that connects this keychain to the computer. And finally, inside, this comes with this sticker or protector. What I'm going to do is connect it to the computer.
Okay, once you've connected your 3 to your computer, you'll see this welcome message. Next, you come to this page (3.o.o.a. diagonally) and choose the type of wallet you have. In this case, we're going to use the 3 for One. Once you click, notice that they show you this video where they emphasize that hologram.
Those are very important elements to verify that your wallet is authentic. Here, in "Continue Wallet," it will ask me to download the program through which the computer will interact with the 3 for One. Then it asks me to choose my operating system. In this case, I choose Windows, and I click here on download.
Once it's downloaded, I run it, give it permission to download, and check where I want to save it. Here, I'm going to install it and wait for it to load. Here it tells me to please disconnect. I proceed to do step 3 and click " Accept," then "Next," and here, " Close." Now you have the option to switch it to Spanish if you want to understand a little more and don't speak English.
Once it's in Spanish, click " Refresh Page" here, and it asks us to reconnect the Tressor to continue. We do so, and immediately it tells us to install the firmware, which isn't included by default for security reasons. So, we simply click "Install." As you can see, the Tressor is in that process; it's quite fast.
Here, the computer screen is asking us to disconnect the Tressor again to continue, and Tressor also indicates that it was updated successfully and that we disconnected it. Now it tells us to reconnect it, and as you can see, it's showing us the message that the update is complete and that we should disconnect again.
Once we do this, we reconnect it, and as we can see, it will ask us to start Tressor. There it is, and here it will show us these two options: the first is to create a new world, and the The second method is to recover an existing wallet. This is the case if you were already using another wallet and want to use it again, continue using those addresses.
You come and do it using this method. Or even if you had three other wallets and simply want to recover the records of one of the crypto assets you had there. What I'm going to do is create a new wallet. To do this, I'm going to click here on "create," and then it will take me to this interface, which is the one I'll always interact with on my physical device.
Okay, here it's asking me for two things: to create a backup and to update the firmware. Well, what we're going to do first is create the backup. I click on it, and as you can see in this message, they are quite clear in saying that before creating a backup, keep in mind the following: some of the seeds will help me recover all the crypto records I have, whether it's three or so dedicated, and from the others, I remove the coins I have there.
Look, they tell me not to store it online because I could lose those seeds. I hope to do it in a way that... Physically, in a safe way, as it says here, look, don't take a picture of those seeds, don't write them on a computer, don't store them in the cloud, and never upload them to the internet. That's super basic.
Please write them down; you can do it on those two little pieces of paper. There are other options; in a future video, I'm going to show you a better option. Here, what you have to do is click " understand" and "accept." Once you've done this, as you can see, step 3 starts showing me the first word that makes up my 24 words, which is the recovery phrase or the seeds.
As you write down the first one, you simply click " next," and it will show you the second word. You click " next," then "notes," and so on with the 24 words they'll give you, until you reach word number 24. Once you finish, click " next," and as you can see, they ask you to quickly check the words you wrote down.
So, if you want, you can check them all until you get to the last one and click "next" again. As you can see, it tells us that we have successfully created those seeds, that backup of the device. Now, what I'm going to do is click "continue," and as you see in The computer screen asks me to generate a PIN, to create a PIN to access my account in the future and confirm my transactions and disk movements.
It tells me to confirm here, on what is marked 3. I press confirm and create that PIN. If you look at this keypad, you'll see that it's showing me the 3, and you'll see that the numbers are randomly arranged, meaning they don't have a specific order. Each time I press 3, it will show a different order.
This is to prevent a virus on your computer from detecting that number. In this case, I'm going to choose a basic PIN. Notice that you have up to 9 digits to access this PIN. I'll use 1 through 5. So, in this case, I take 1, 2, 3, 4, and 5. Okay, and I press here on "enter PIN." Notice that it asks me to enter it again, so I enter 1, 2, 3, 4, and 5, and I press here on " enter PIN." It says, "Good job, it's ready, and that's the meeting." What I'm going to do is press "continue," and now it asks me to...
I placed a man on my device, and in this case, I'm going to give it the word "value" and click "confirm" to continue. As you can see, to validate each change, they're going to ask me for the PIN I already created, from 1 to 5. I enter it, go to 3, and confirm the name I gave it. Now I click "continue," and here they generate a security warning, especially regarding phishing attacks—those pages that look legitimate but change a period, a slash, something.
So they simply tell me that I can do this action or just copy it into my browser, and it always takes me to the same page. I saw who wanted to continue, and now they're going to ask me if I want to receive newsletters and security information. Here, I put my email to receive that information firsthand.
You don't type it in, you accept the terms and conditions, and you click " continue." If you want, you can follow them on these social networks. I recommend following them on Twitter. Well, we click " continue" here, and they tell me that's it, that from this moment on, I can receive Bitcoin or any other type of cryptocurrency and send it, obviously when I have funds.
Look. We still need to update the firmware here. We'll just click " Finish" and it will update quickly. Here, we click " Show more details." It asks us to disconnect the Tressor and, when connecting it, to keep both buttons pressed. So, I'm going to press both buttons and simply connect it. Notice how it asks if I already have a recovery seed.
I should check this box and update to the version they 're indicating. I click it and it proceeds to update to that version. I confirm by clicking " Next" and there we can see how the update loads. Now it asks me to confirm the fingerprint. Notice why it starts and ends with the fingerprint; if the information is correct, simply click " Confirm" here.
And look, Tressor tells me that it has been successfully updated and to disconnect Tressor again. I reconnect it, and as you can see, it's telling me that the update has finished. I disconnect it again, reconnect it, and that's it. It's now telling me that it's updated. Now it asks me to... You said the PIN to be able to log in.
Once you do, they ask you to enter the PIN and that's it, perfect. It shows you that you now have access to your wallet. Okay, now I'm going to quickly describe what you see on the screen at the top. Here you can do it with the currency you want. In this case, we're going to use Discut, but you can use any other currency.
Here, on the transactions side, you'll always see the incoming transactions. We haven't received anything yet, so nothing appears in the " Receive" section. This is the address you should give it. If you want, you can select " Show full address" and the Discut address will appear. You can also create an account for another person to send you.
Look, it tells you to verify that same address on the third screen. Let's read "Show full address." And here in this " Send" section, it will show us the options we have when we have Bitcoin. So here in "Address," we're going to put the Bitcoin address of another person or one of us where we want to send the amount of Discut, and here the amount.
Here it will calculate how much it's equivalent to in dollars, and here the cost of the transaction. It's super important that a wallet has the option to say how much you want to pay for a transaction. I can put the lowest amount here and that's it, I click send. Look, here on the right it says yes, and another recipient.
That's for when you want to make several transactions and save on fees for that type of transaction. Who it goes to, and it will allow you to buy bitcoins, especially through credit cards. I don't recommend it because that's generally expensive; the fees charged by Simple, which is the operator most people use, are very expensive.
And here in this part of XXI you can also do it, but here you start giving your information, which I do n't recommend. Here in the sign and verify section, you can do it with your different messages that you have the intention of. Now look at the left side. Here I enter my account, which I named "Value." Here it's showing me the name, the PIN I have, the total balance at the moment, and here are the public keys.
These keys are simply to give them when you use services in Excel, for example, APIs, or when You have payment processors that will ask you for this so they can rotate your address. Otherwise, don't give your public keys to anyone, not because they'll steal your vehicles, but because they can detect the exact amount of Bitcoin you have in this wallet since they can access all your addresses.
Look, they live here and tell you to be very careful with your public keys. Now, notice that here they give you a home screen of our [unclear - possibly "our"] where you can configure whatever you want here in the advanced section. And something very interesting, which I want to cover in another video, is that here we can install an additional passphrase, or what's called a password phrase.
Look, I'll give you a tip: this can be implemented and it's very good because let's say you lose your seed phrase or someone else has access to it. If you have this phrase configured, even if they have your seed phrase, they won't be able to steal your Bitcoins. I repeat, even if they have the seed phrase.
Now, be very careful with this because, as you say, if you forget that passphrase, which can even be just one word, but it Be as secure as possible, because you could also lose access to your Bitcoin. That's why it's important to write a copy and keep it very well stored. Now, obviously, don't leave this additional password or passphrase in the same place as the seed phrase, because then it's useless.
This has many applications, especially if they already know you have Bitcoin and want to steal it. What you can do is create this type of thing, and you'll have several accounts here. You'll give the attacker one account and even another security key from another account you 've created here. As you can see, you can create as many accounts and the same with as many passphrases or passwords as you want.
Finally, I'm done with this part. Here in the application settings, you can change the currency if you want or not. Well, I think that's what we can talk about in general. In a future video, I'll explain this passphrase, since it's very important to keep it in mind, but it's for slightly more advanced users.
Remember, if you're going to buy the wallet, please use the link. I've included a description of the video with your suggestions. If you'd like to help me create more content about wallets, please let me know. I hope you found the video helpful. Please give it a thumbs up if you found the information useful, and I'll see you in the next one!

Comments 0